The Minimal iPhone Video Setup for Content Creators
A practical iPhone video setup guide for content creators: the only gear that actually matters, camera settings, and a workflow that gets you from idea to posted.
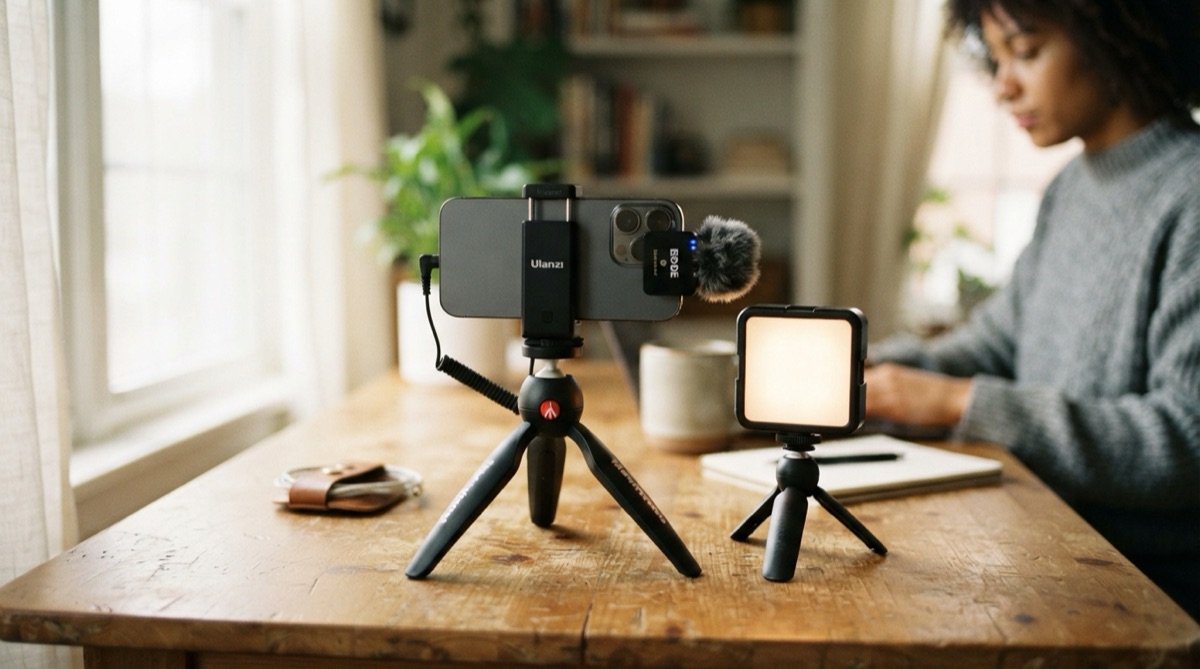
The best video setup is the one you actually use. Most content creators delay posting because they are waiting to afford better gear, better light, a better camera — when the footage they are shooting on their iPhone right now is sharper and more stable than anything a professional studio had ten years ago.
This guide is the minimalist version: the gear additions that make a real difference, the camera settings worth changing, and a workflow that takes you from idea to published video without a full production day.
The Only Gear Worth Buying First
Do not buy a camera. Do not buy a drone. The three accessories that actually move the needle on an iPhone video setup, in order of impact:
1. A tripod with a phone clamp (~$15–30)
Shaky footage is the fastest way to look amateur regardless of resolution. A basic tripod and a phone clamp eliminate camera shake entirely. Look for one with a ball head so you can adjust the angle quickly, and check that the clamp fits your phone's width (including a case if you use one).
2. A clip-on lavalier microphone (~$15–25)
iPhone audio is fine in a quiet room two feet from your face. The moment you step back, add background noise, or record outdoors, it deteriorates. A clip-on lav that plugs into your Lightning or USB-C port solves the problem with no technical setup. Clip it to your collar, run the cable behind your shirt if you care about aesthetics, done.
3. A small LED panel or ring light (~$20–40)
Only necessary if you shoot indoors at night or in a dim room. If you have a window and shoot during the day, you do not need this yet. When you do add it, place it in front of you at roughly face height, not above or behind. Avoid ring lights mounted directly on the phone — they create a noticeable catch light in the eyes that reads as low-budget on close-up shots.
iPhone Camera Settings Worth Changing
The default camera app auto-adjusts aggressively, which is great for casual shots and annoying for video. A few settings to lock down:
- Resolution and frame rate. Open Settings → Camera → Record Video. 1080p at 30fps is the most compatible choice for most platforms. 4K is available but creates large files and can exceed platform limits. 24fps gives a cinematic look; 60fps is smoother but more clinical — choose based on your content style.
- Lock focus and exposure. In the Camera app, tap and hold on your face until "AE/AF Lock" appears. This prevents the camera from hunting for focus or adjusting brightness mid-sentence.
- Turn off Auto HDR for talking head video. HDR processing can make skin tones look odd when combined with some editing tools. Toggle it off in Settings → Camera.
- Shoot in standard mode, not Cinematic. Cinematic mode's automatic focus shift is impressive for B-roll but unpredictable for talking head footage — it sometimes racks focus away from your face to a background object mid-sentence.
Scripting and Delivery: The Invisible Gear
A sharp image and clean audio lose half their value if the delivery is hesitant or reads as scripted. This is where most creators lose takes, not in the camera or lighting setup.
Two approaches that work at different speeds:
- Bullet-point speaking. Write three to five points you want to hit, not a word-for-word script. Then talk to the camera as if explaining to a friend. Slower to get right, but more natural-sounding when it works.
- Teleprompter scripting. Write the script, tune the scroll speed to your natural speaking pace, and deliver it as conversational as possible. The risk is sounding like you're reading; the fix is keeping the text near the lens. Cueflow scrolls your script directly over the camera view near the lens and records clean footage with no overlay in the export. The AI can also write the script from an idea you drop in, including adjusting to an exact target length — so the write-to-record loop stays in one app.
If you are working on script structure before worrying about delivery, our guide to writing a 60-second video script covers the hook-body-CTA structure and word budgets in detail.
A Publish-Ready Workflow in Four Steps
Gear does not create content; a repeatable workflow does. Here is a minimal one:
- Script or outline in the morning. Even a rough bullet list the night before beats staring at the camera blank. With AI scripting, this step collapses to a few minutes.
- Set up and shoot in one sitting. Run through the checklist (frame, light, audio, script), do one test clip, and roll. Aim to get a usable take in three tries — if it takes more, the script is the issue, not the setup.
- Edit on your phone or desktop. Cut out the dead air at the start and end, trim the worst stumbles, and add captions if your platform rewards them. CapCut and iMovie both handle the basics on a phone.
- Post the same day you shoot. Posting rhythm matters more than production polish, especially early on. Done beats perfect.
FAQ
Do I need a ring light for iPhone video?
Only if you shoot in dim conditions — if you can sit facing a window in daylight, that is already better light than most ring lights provide. Add artificial light when natural light is not available or consistent enough.
What is the best free teleprompter app for iPhone?
Several free options exist, but the key features to check are: does the text scroll over the camera (not below it), and does the recording export clean with no overlay text burned in? Cueflow's free tier includes the prompter fundamentals without a subscription — a subscription unlocks unlimited AI scripting.
Should I shoot in portrait or landscape for social media?
Shoot vertical (portrait) if TikTok, Instagram Reels, or YouTube Shorts is your primary platform — the algorithm rewards native aspect ratios. Shoot horizontal (landscape) if YouTube long-form or embedded website video is the destination. If you need both, shoot horizontal and crop down; the reverse loses quality and shows black bars.
The AI teleprompter for content creators.
Cueflow — Cueflow writes your script with AI, scrolls it over the live camera at your speaking speed, and records clean video — no rig, no second phone, no burned-in text.
Download Cueflowfree on the App StoreKeep reading

How Many Words Per Minute in a Speech? A Chart by Length
How many words per minute in a speech: a chart from 30 seconds to 20 minutes, how to measure your own pace, and a worked example for a 5-minute talk.

How to Write a Voiceover Script (Format and Example)
How to write a voiceover script that fits the picture: scene-by-scene format, word budgets per second, a 45-second example, and recording on iPhone.

How to Write a YouTube Script: A Step-by-Step Method
How to write a YouTube script that holds viewers: a one-line promise, a 15-second hook, beats with re-hooks, and word counts sized to your target length.